• Skip to main content
  • Skip to primary sidebar
Andrea's Dainty Kitchen
menu icon
go to homepage
  • All Recipes
  • Recipe Index
  • Contact
  • Subscribe
    • Facebook
    • Instagram
    • Pinterest
  • subscribe
    search icon
    Homepage link
    • All Recipes
    • Recipe Index
    • Contact
    • Subscribe
    • Facebook
    • Instagram
    • Pinterest
  • ×
    Home » Kitchen & Food Tips

    How to Line a Square Baking Tin - Tutorial

    Published: November 22, 2021 by Andrea · This post may contain affiliate links. Please read the disclosures and disclaimers page for details.

    This tutorial is to show you how I line a square baking tin. I make lots of square cakes and bar recipes which is why it was important for me to learn how to properly line a square baking tin. In the past, I’ve had a few accidents with finished recipes due to me not lining my tins properly. Since learning how to, my cakes and bars are easily removed from the tins with no more accidents.

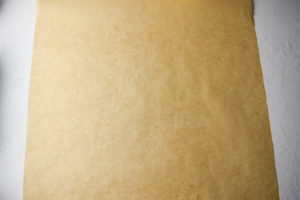
    1. Start by cutting a large piece of parchment paper. Ensure it is larger than the size of your tin.

    Parchment paper

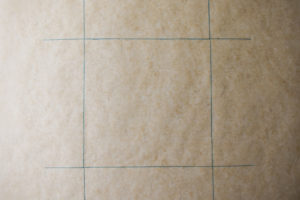
    2. Place the tin in the middle of the paper with the open side up and draw lines around the tin using a pencil.

    Baking tin and parchement paper

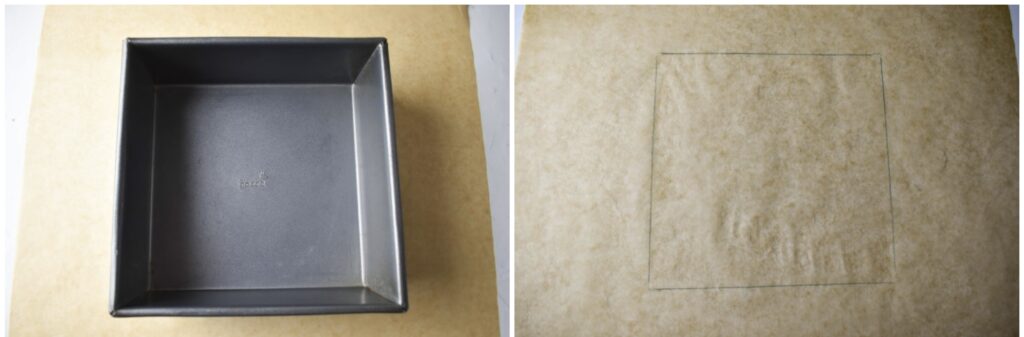
    3. Using a ruler draw 8 lines, 2 from each corner as pictured. Ensure the length of the line is longer than the depth of the baking tin.

    Line a square baking tin

    4. Using scissors, cut along all 8 lines and remove the piece of parchment from each corner. 

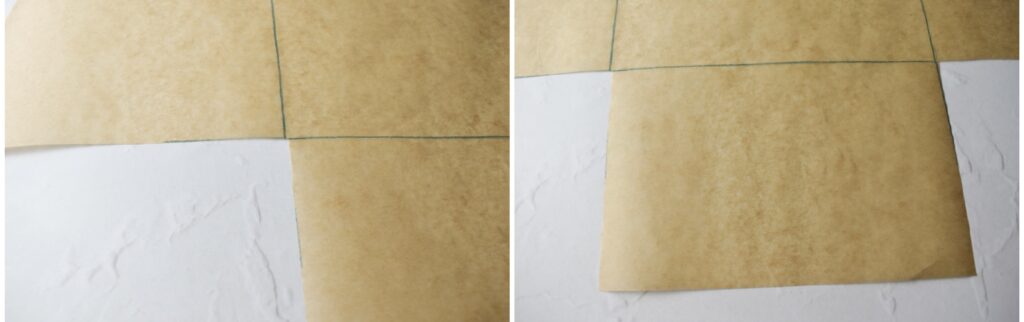
    5. If the 4 flaps are too long, give them a trim. Now place the baking paper into the tin and it should fit snug and neat. Ensure you leave some overhang to hold onto to remove your cakes and bars from the tin.

    Line a square baking tin

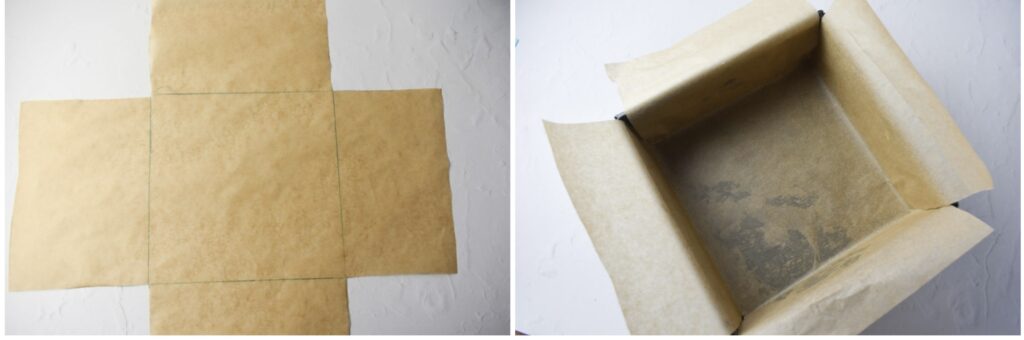
    Also I turn the parchment paper upside down when placing it in the tin so the pencil lines are facing the inside of the tin.

    There you have it! A quick simple way to line your square tin. This method also works to line a rectangular cake tin.

    Posts You May Like!

    • Converting Oven Temperatures
    • How to Prevent and Fix Split (Seized) Chocolate

    More Kitchen & Food Tips

    • How to Prevent and Fix Split (Seized) Chocolate
    • Beef Steaks
      How to Choose Cuts of Beef
    • Strawberry Plant
      Tips for Growing Strawberries in Containers
    • Oven Temperature Conversions

    Primary Sidebar

    Meet Andrea!

    Hi I’m Andrea and I am the writer and food photographer behind Andrea’s Dainty Kitchen. I share a selection of recipes and provide step by step instructions to help readers get the best results from their time in the kitchen.

    Read More!

    Popular Recipes

    • Orange Loaf Cake  
    • Deli sandwich
      Deli Style Pastrami Sandwich
    • Mango traybake cake with mango glaze
      Super Moist Mango Coconut Cake
    • Caramel Tart
      Simple Caramel Tart 
    • Seabass fillets -pan fried
      Lightly Dusted Pan-Fried Sea Bass Fillets
    • Cornflakes Squares
      Chocolate Cornflake Squares (No Bake)
    • Pepparkakor Swedish Ginger Thins
      Ginger Thin Biscuits
    • Crispy Sweet Chilli Chicken with Noodles
      Crispy Sweet Chilli Chicken with Noodles

    Footer


    Privacy & Terms

    Privacy Policy

    Terms of Use

    Disclosures and Disclaimers


    Learn More

    About

    Contact

    Newsletter


    Socials

    • Pinterest
    • Facebook
    • Instagram

    Copyright© 2025 Andrea's Dainty Kitchen